Gear & Tackle
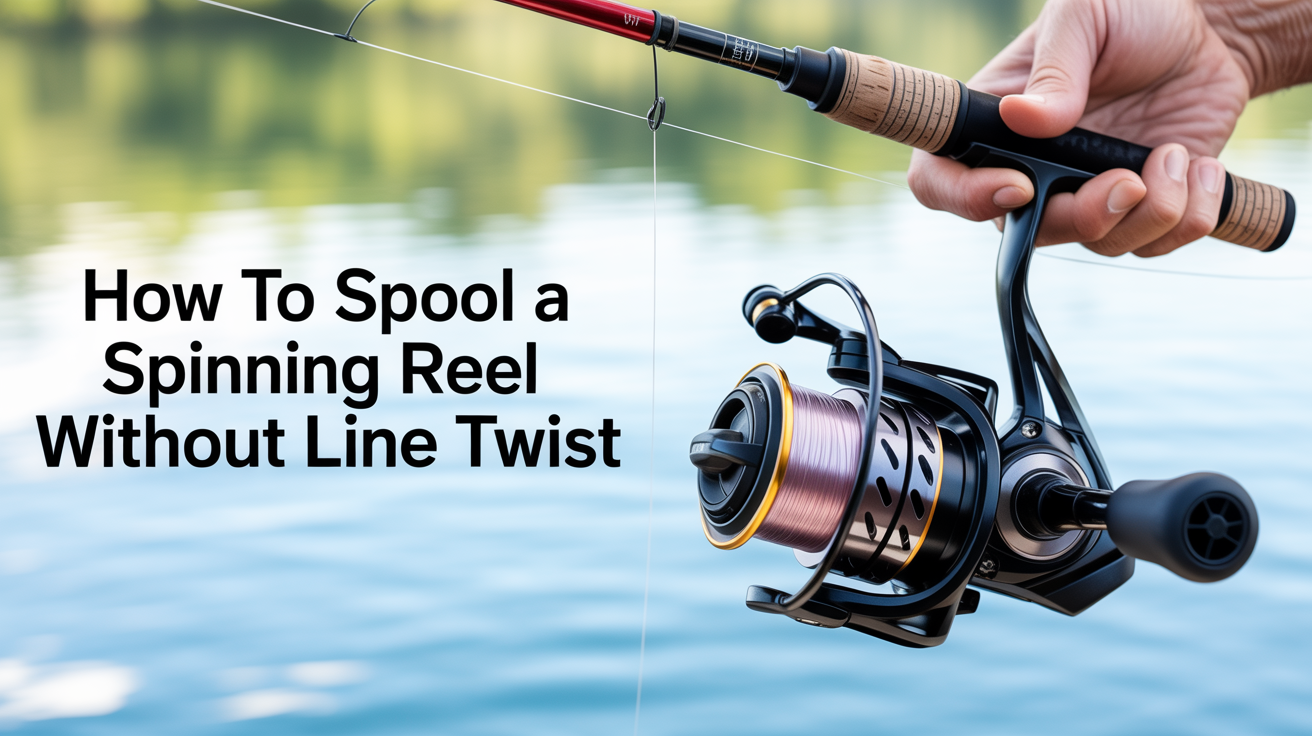
How to Spool a Spinning Reel Without Line Twist
Learn how to spool a spinning reel correctly—label up, arbor knot, proper tension, and the flip test—so you never deal with line twist again.
Line twist is probably the single most common frustration for new anglers. You put fresh line on the reel, head out, and within a few casts the line is coiling off itself in chaotic loops. Half the time the culprit isn't a bad reel or cheap line, it's the spooling process itself. Get that right once, and the problem mostly goes away.
This guide walks through every step: the knot, the orientation, the tension, the fill level, and how to test whether you did it correctly before you're standing at the water.
Why Line Twist Happens
A spinning reel's bail rotates line onto the spool in a circular path. The filler spool (the one the line comes on from the store) doesn't rotate. So if the line comes off the filler spool in the wrong direction relative to how the bail is laying it down, you're feeding twist into the line with every turn of the handle.
Think of it this way: if the bail wraps line clockwise and the filler spool releases it counter-clockwise, those opposing rotations compound into coils. Do that over a hundred yards and you have a problem that no amount of re-casting will fix cleanly.
The fix is orientation, specifically keeping the filler spool's label facing up so the line peels off in the same direction the bail lays it down.
What You Need Before You Start
- The reel, mounted on the rod (or at least held in hand)
- New fishing line on its filler spool
- Scissors or line cutters
- A cloth or folded rag (for tension)
- A pen or pencil (optional, for threading through the filler spool)
You'll also want to know your reel's line capacity. It's printed on the spool, something like "10 lb / 145 yd" or "6 lb mono / 200 yd." Don't exceed it. An overfilled spool causes more tangles than an underfilled one.
If you're deciding between mono, fluorocarbon, and braid, check out Fishing Line Explained: Mono vs. Braid vs. Fluorocarbon before you buy. The spooling process is the same across all three, but mono is the most forgiving for beginners and telegraphs twist most visibly.
How to Spool a Spinning Reel: Step by Step
Step 1, Thread the Line Through the First Guide
Open the bail on the reel. Run the tag end of your line down from the filler spool, through the rod's first (largest) guide near the reel seat, and then down to the reel. Don't thread it through additional guides yet, just that first one is enough to put light directional pressure on the line while you're spooling.
Step 2, Orient the Filler Spool Correctly
Set the filler spool flat on the floor or a table with the label facing up. This is the single most important step. The line should peel off the top of the filler spool the same way water pours off a spinning plate. When the bail rotates and wraps line clockwise onto your reel, the filler spool needs to release it clockwise too, which only happens when the label faces up.
If you're unsure, here's a quick check: let a few feet of line fall loosely to the ground. If it piles up without coiling, the orientation is correct. If it coils on its own, flip the filler spool over.
Step 3, Tie the Arbor Knot
The arbor knot secures the line to the reel's spool. Without a solid anchor, the line will just spin freely on the spool when you try to reel under tension.
- Pass the tag end around the arbor (the center post of the spool).
- Tie an overhand knot around the standing line.
- Tie a second overhand knot in the tag end, about an inch below the first.
- Wet the knots, then pull the standing line to cinch them down against the arbor.
The second overhand knot acts as a stopper so the first knot can't slip through. Trim the tag end close, a half inch is fine.
Alternatively, some anglers use a simple uni knot to the arbor. Either works. The arbor knot is faster for most beginners.
Step 4, Apply Tension with a Cloth
This step separates a tight, well-layered spool from a loose, uneven one. Loop the line between two fingers of one hand, or better yet, fold a cloth over the line and pinch it. Hold light-to-moderate pressure as you crank the reel.
The goal is to lay line onto the spool under tension so the wraps are snug against each other. Loose wraps sink into each other under casting pressure, which causes tangles and, again, twist.
Don't go so tight that the line cuts into your fingers or deforms. Firm and steady is the right feel.
Step 5, Fill to the Right Level
Reel until the line is about 1/8 inch from the lip of the spool. That's roughly the thickness of two pennies stacked. At that fill level, line flows off freely during a cast without spilling over in a tangle.
Underfill by more than that and casting distance drops noticeably because the line has to climb a tall spool wall before it can run. Overfill and line billows off the front of the spool with every cast and wraps around the tip or forms bird's nests.
Stop regularly to look at the spool edge rather than guessing. It takes a minute longer but saves frustration.
Step 6, The Flip Test for Twist
Before cutting the line from the filler spool, let out about 20 feet of slack onto the ground or into calm water. Hold the line up loosely. If it hangs straight or forms very gentle arcs, you're in good shape. If it corkscrews into tight coils, you've introduced twist.
If there's twist, the fix is simple: flip the filler spool over and reel in the loose line under tension. The reversed orientation will usually unwind the twist as you refill. Do the test again before cutting.
Backing and Running Line: Mono Under Braid
Braided line is slick. On many spinning reels, a braid-only spool will spin freely on the arbor even after tying the arbor knot, because braid has almost no grip against metal or plastic.
The fix is mono backing, typically 10–15 wraps of monofilament tied to the arbor first, then the braid tied to the mono with a uni-to-uni knot or an Alberto knot. The mono grips the arbor; the braid grips the mono.
Some anglers use a short piece of electrical tape over the first few mono wraps to further prevent slippage before adding braid. It sounds fussy but takes about 30 seconds and is worth doing if you're fishing heavier braid.
If you're not sure whether braid or mono is the right call for your situation, the comparison in Fishing Line Explained: Mono vs. Braid vs. Fluorocarbon covers the tradeoffs plainly.
Diagnosing and Fixing Twist on an Already-Spooled Reel
If you're dealing with twist on line that's already on the reel, there's a reliable field fix. Pull all the line off the reel and let it drag behind a boat or along a current for a few minutes under light tension. The water resistance straightens the coils. Reel it back in under firm tension.
If you're not near moving water, let the line out on a field or parking lot, step on the far end, and walk the length. Then reel back under tension. It's not as effective as the water method, but it helps.
You can also simply cut off the twisted section if it's only the first 30–40 feet. The twist is usually worst near the reel and better toward the end.
Matching Line to Reel
Line selection affects how it behaves on the spool. Heavier line has more memory, meaning it wants to hold the shape of the coils it was stored in, which makes twist more visible and more problematic. Lighter line is more flexible and lies flatter.
For a beginner spinning setup, 6–10 lb mono is a practical range for most freshwater fishing. It's manageable, has reasonable sensitivity, and spools without much fuss. If you're targeting larger species or fishing heavy cover, bump to 12–15 lb or consider braid with a mono leader.
The rod also matters here. A longer, lighter-power rod paired with light line casts cleanly and helps you feel what's happening on the retrieve. See How to Choose a Fishing Rod: Length, Power, and Action Explained if you're still working out your rod selection.
And if you're wondering whether a spinning reel is even the right choice for where you're starting, Spinning Reel vs. Baitcaster: Which Should You Buy First? covers that directly.
Tackle Theory is an independent freshwater-fishing resource. Our guides are researched and written in-house; we are not affiliated with, endorsed by, or sponsored by any tackle brand, guide service, or retailer we mention.
FAQ
How often should I replace my fishing line?
Monofilament degrades from UV exposure and general use. A good rule of thumb is once a season for lines you fish regularly, or whenever you notice significant memory (tight coiling), surface abrasion, or any visible discoloration. Braid lasts longer but should be inspected for fraying near the reel and at knot points after heavy use.
Can I reuse old line from a reel?
You can, with caveats. If it was on the reel for a season or less and has no visible damage, use the flip test and lay it back under tension. If it's coiling badly, abrasion is visible, or you can't remember when you last changed it, replace it. Line is inexpensive compared to losing a fish to a line break.
Why does my line keep looping off the reel even after fresh spooling?
Two likely causes: the spool is overfilled (line past the 1/8" mark spills freely), or the line was spooled with the filler spool in the wrong orientation and twist is now baked in. Check the fill level first. If that's fine, pull off the line and respool with the label facing up.
Do I need a line conditioner or spool softener?
Not typically. Monofilament can benefit from being submerged in warm water before spooling, which relaxes memory and makes it lie flatter. A dedicated line conditioner spray does a similar thing. Neither is necessary, but both are useful if you're working with stiff mono that's been stored a while.
What's the difference between spooling braid directly versus using mono backing?
Braid spooled directly often slips on the arbor, especially under the sudden load of a hard-running fish. With mono backing (even 15–20 wraps), the connection is secure. Some anglers skip backing and rely on tape alone, which works but creates a slight bump under the braid. The backing method is cleaner and more reliable for most spinning setups.